Solo Home Hemodialysis: Taking the Plunge
Today, more people are doing home hemodialysis (HD) than ever before—even those who live alone. In 2017, the U.S. FDA approved solo home HD with a NxStage machine.* This means you have more options to make a treatment choice that fits your life.
*Note: TheTablo and the Quanta SC+ have been approved by the FDA for home HD in the U.S. As soon as they are approved for solo use, we will update this page!
If you don’t have a care partner, choosing solo home HD can give you:
-
More control of your life and your treatment times
-
More independence
-
Less feeling like a burden on friends and family
-
Less risk of infection
“I live alone and do home HD. It can be overwhelming at times, but the flexibility compared to in-center makes it well worth it to me. There are, of course, risks—but there are risks driving to and from treatment in center. The worst part is when I forget something. Like, tonight I forgot to turn the heat up and I'm freezing. LOL!”
Staying Safe with Solo Home HD
You will learn much more in training than just how to get a good treatment. Your training nurse will make sure that you know what to do when something goes wrong. You will practice while the nurse is there to help you—and when s/he is out of the room. Serious events during home HD (solo or with a partner) are rare. You will not go home until you and your training nurse are both confident that you will be safe.
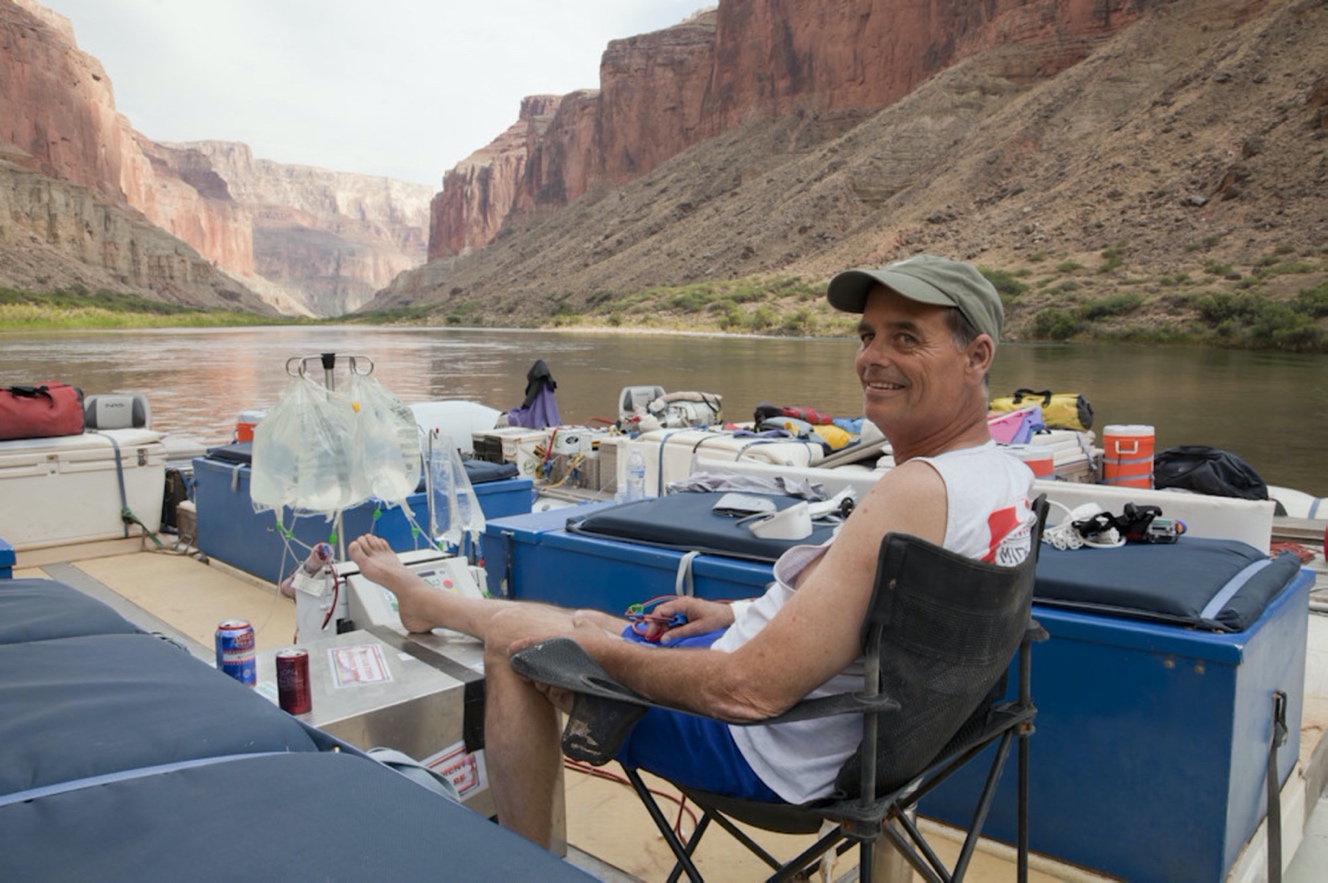
Bill Peckham did solo HD at home—and on vacation. Here he is on a raft on the Colorado River.
To keep you safe at home, your clinic may ask you to:
-
Subscribe to a medic alert service with a button you can wear or keep by the chair.
-
Add 911 to your speed dial.
-
Check in with a friend by text or a baby monitor at the start and end of a treatment.
-
Have remote monitoring by your clinic during HD.
Your clinic may also give you safety devices to use, like:
-
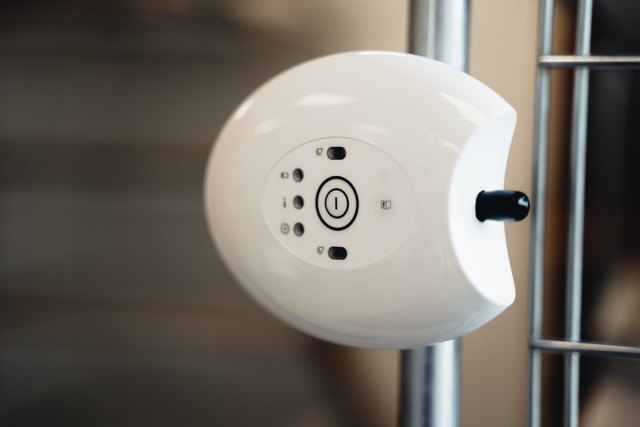
An FDA-approved blood loss alarm, such as the Redsense device to put on your access.
-
A fluid leak detector
-
Extra secure taping
Do not fear mistakes. They help you learn. You’ll remember never to make that same mistake again. Laugh at your mistakes no matter how bad they seem. They are a rite of passage. You can survive them with laughter and hydrogen peroxide—your best friend. It will remove blood from almost anything.
When you first start to dialyze at home, there will be a lot of adjustments. It can be overwhelming and frustrating. You will adapt and it will get easier. Promise yourself a full year to adjust to home HD. Everything gets easier and faster once you get into a routine! More than 15,000 people who do home HD agree. Read this article to learn more about how you can fit your dialysis treatment into your life and schedule.
Helpful Tips:
-
You are not alone with solo home HD. Your nurse and machine company will answer questions 24/7. Our active Facebook group has more than 5,800 members, so you can talk with others who are solo—day or night.
-
When you need a break, you can get respite care. Tired? Stressed? Had surgery? Your clinic can set up in-center HD for you for up to 30 days.
-
Stay calm. Accidents happen. There are safety measures built into your machine.
-
Download the third-party DailyHemo Alarm app (for NxStage) if you have an Android phone. This will let you check and fix most alarms. And, you can always call NxStage Technical Support at 1 (866) NxSTAGE (697-8243).
“ I've been doing home HD alone since March. I put a doorbell on my machine with the other end at my friend's house next door. I also have a medical alert button if I need an ambulance. But I haven't had to use them. I wouldn't go back to the clinic if I had the choice.”
Getting Ready for Solo Home HD
Arranging Your Treatment Room“I lived alone and did solo dialysis for about 9 months. The key is to set up everything close to the machine. Anything you might need needs to be close by.”
Your treatment room needs to work for you and keep what you will need at hand. You can choose any room that has space for your chair or bed, the machine, and supplies. You’ll also want to give some thought as to how you want to spend your time while you do your treatment:
-
Watching TV (keep the remote close by)
-
Using a computer
-
Reading
-
Napping
-
Writing letters or paying bills
-
Spending time with friends
Arrange the room so you like how it looks and will work for all of the things you’d like to be able to do. It does not have to look like a dialysis clinic. You will want to have a number of things in easy reach. A low bookcase, table, dresser, and/or an overbed table on wheels next to the machine will let you keep things handy. You might want to do a dry run in your treatment room when you are not doing a treatment, to be sure everything is set. Just stay in the bed or chair for the length of the treatment. You’ll want to have:
-
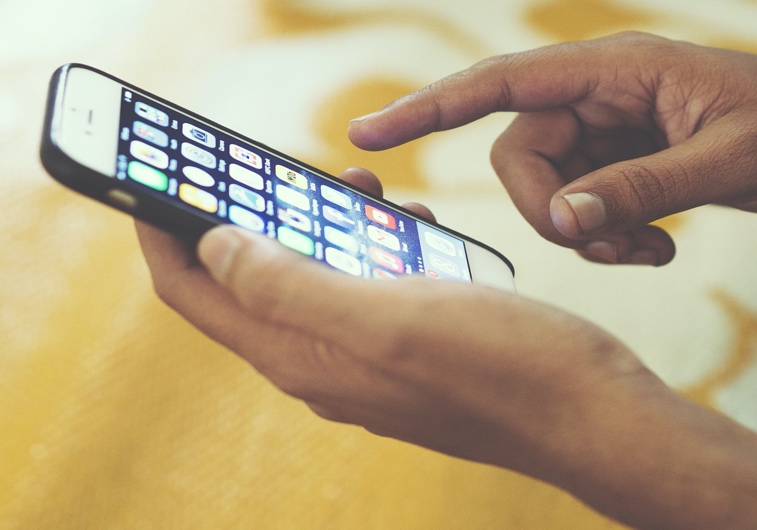
Your charged cell phone
-
The clinic and NxStage phone numbers
-
The NxStage manual or Nx2me app on an iPad
-
A flashlight (in case the power goes out)
-
Snacks
-
The TV remote, book(s), magazine(s), bills to pay, etc.
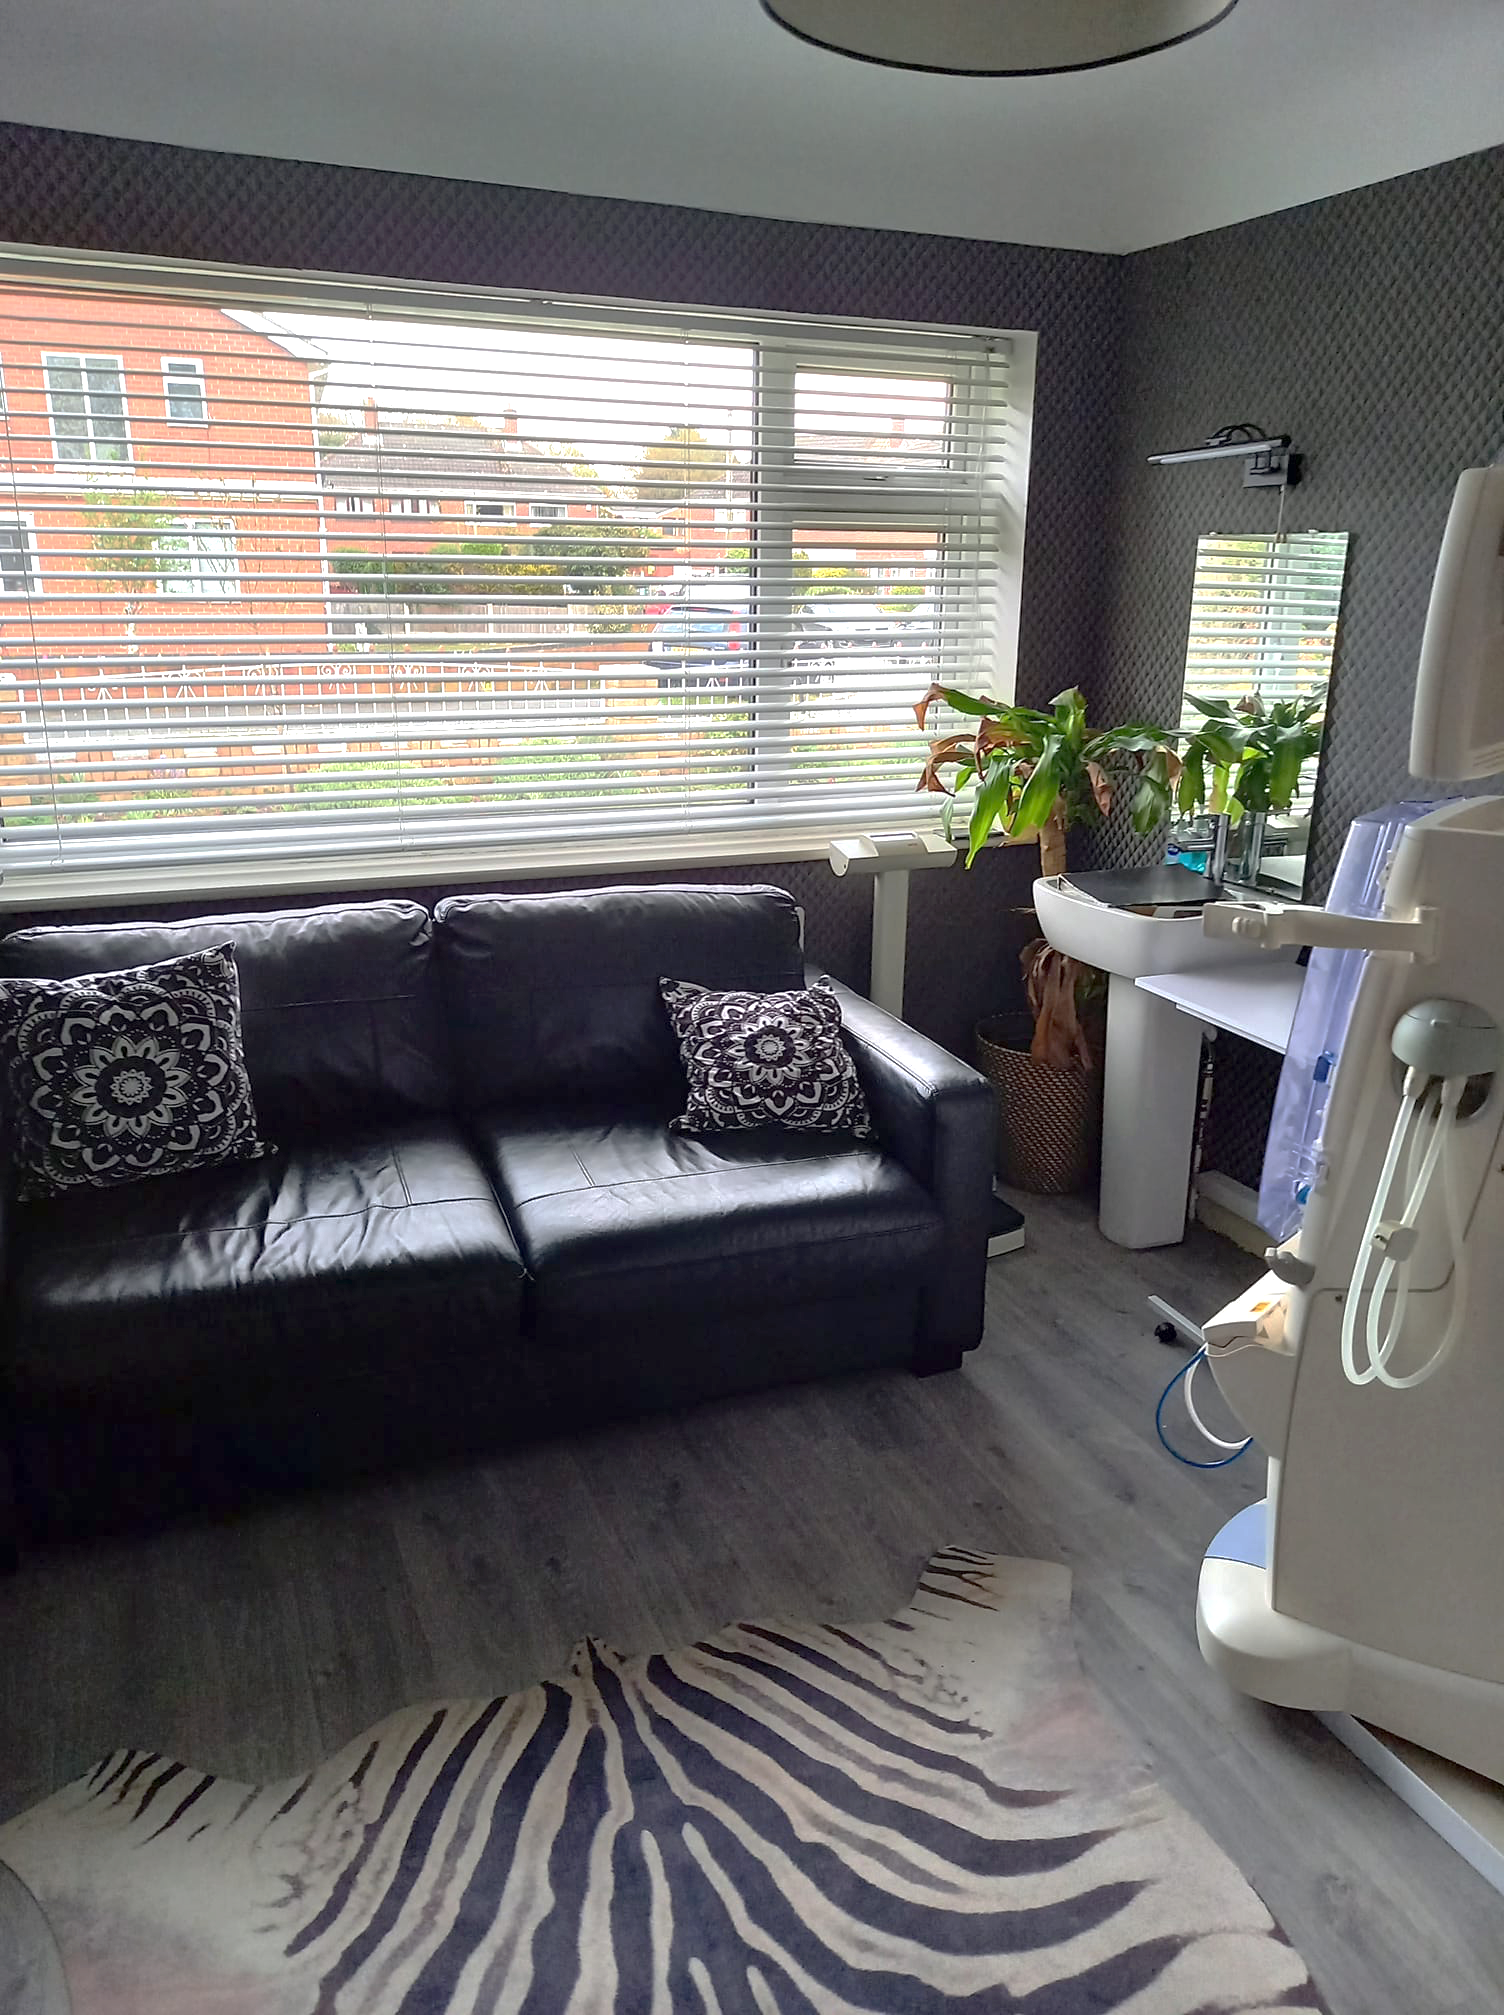
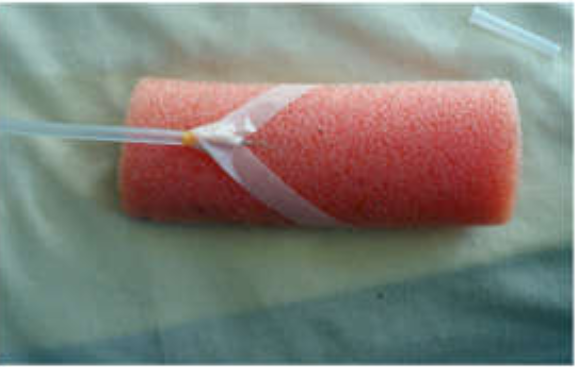
These images used with permission from Angela L. Smith
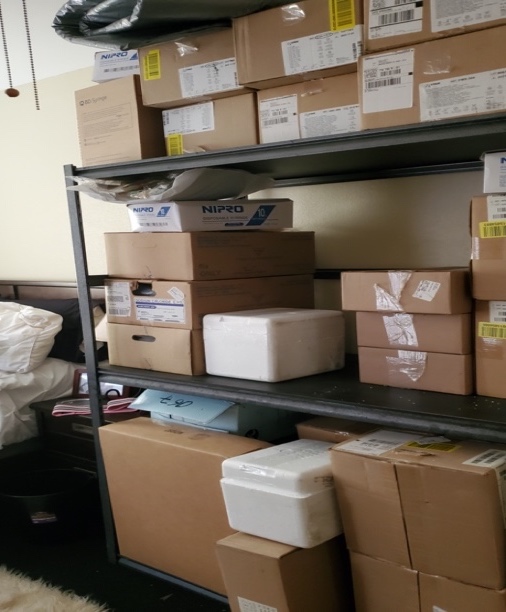
Dealing with SuppliesSupplies might be the Achilles heel of home HD. No one can prepare you for that first delivery! Your first shipment could beup to 30–50 boxes of dialysate and other supplies. This can be overwhelming if you live in a small space. (Fewer supplies are needed for home HD than for peritoneal dialysis, though). How many boxes you get will depend on:
-
Your treatment schedule
-
Whether you use hanging bags or PureFlow saks
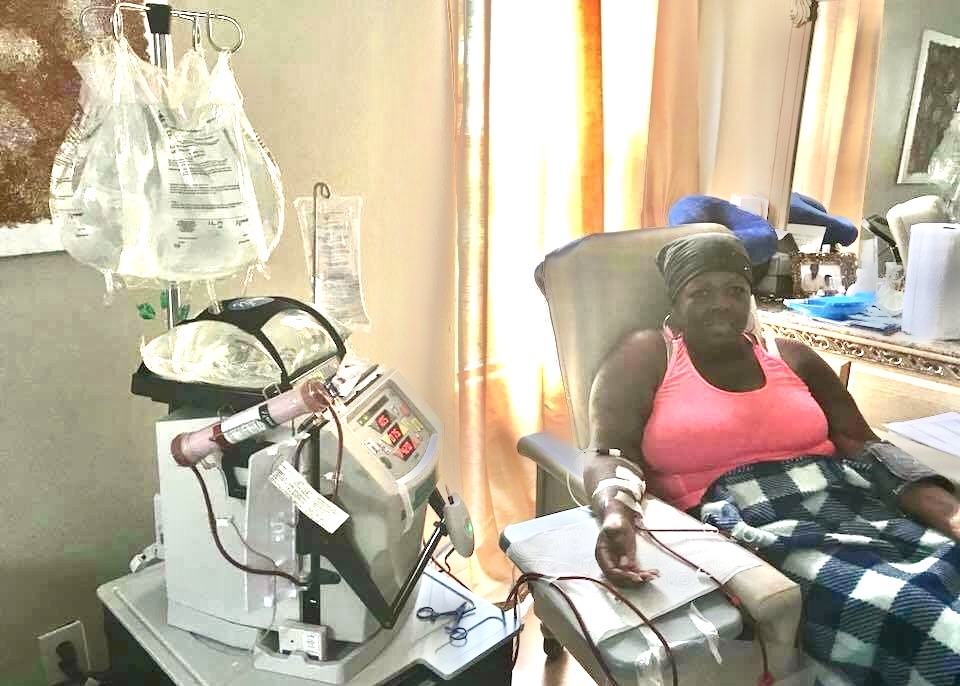
This image used with permission from Angela L. Smith
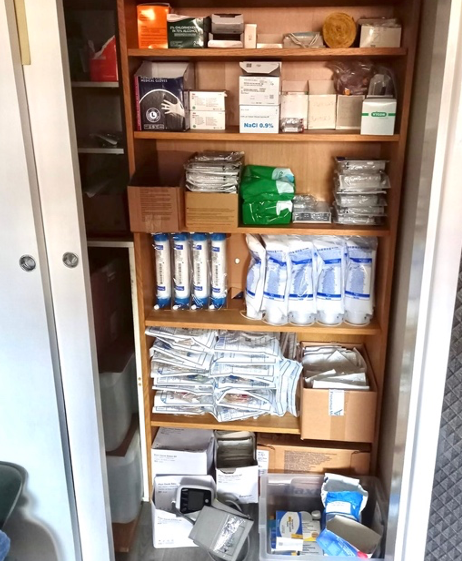
This image used with permission from Stephen Hewitt
Here is an article with lots of storage ideas. Some other tips:
-
Boxes waste space. Unpack them and take out the supplies to decrease the space you need by more than 50%.
-
Put supplies into under bed storage trays. Four trays under a twin bed can hold a month’s worth of dialysate and supplies.
-
Or, store dialysate and saline in dresser drawers, trunks, plastic totes, or armoires.
-
Put the PureFlow and cycler on a dollywith wheels. This allows for ease of movement. Some people keep the cycler in the closet and bring it out just for treatment. This helps avoid the look of a clinic in your home.
-
Store supplies you need during treatment in a tote, basket, or plastic dresser on wheels.
-
A mother of young children with limited space lined the wall of a room with supply boxes. This created a canvas for her kids to draw on.
-
Another family used the supply boxes as building blocks for their kids. They created forts and other fun projects.
Setting Up for Treatment
The beauty of home HD is that you can do your treatment on your own schedule. When your plans change, you can adjust. The rest of the time, you can set a time that works for you, which will help you know when to set up the machine. One patient shared her plan for setting up her machine:
It takes 7 hours to make the dialysate for treatment. Once that “sak” is started, I can forget about it and go about my day or sleep through the night. Depending on my schedule, I:
-
Set up the PureFlow to make a sak in the morning for an evening treatment.
-
Set up the PureFlow to make a sak overnight for a treatment the next day.
-
I always keep 2–3 treatments of hanging bags for emergency use. I use these in case of a PureFlow problem, or if I go away for a weekend.
At least half an hour before I plan to start a treatment, I set the machine to Prime. This takes about 25 minutes. When it is done, I can:
-
Start my treatment.
-
Wait—up to 12 hours—and treat later.
Note: The NxStage manual says it is safe for up to 72 hours. Your clinic may set its own limits.
Prepare to Self-cannulate
If you have a fistula or graft, you will learn in training how to put in and take out your own needles. Your clinic will teach you how to do this with one hand. Over time you will find ways that work best for you.
- Use a product that can help you tape your needles with one hand. In the U.S., the TNT Moborg company makes the Immobile’ FST.
-
Most HD needles are color-coded. Red is arterial, blue is venous. If they are not, take care not to mix up the lines.
-
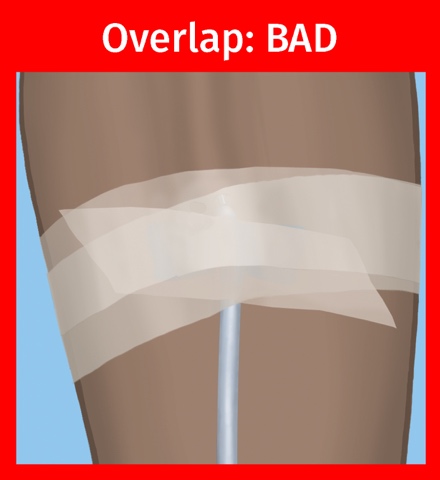
Use Chevron or Butterfly taping. Research has found these to be much safer than just lots of pieces of tape that all go the same way. 1
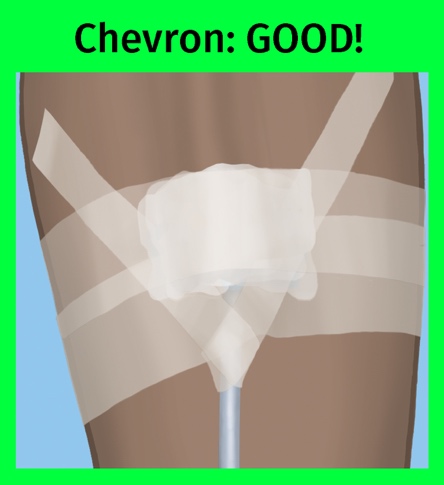
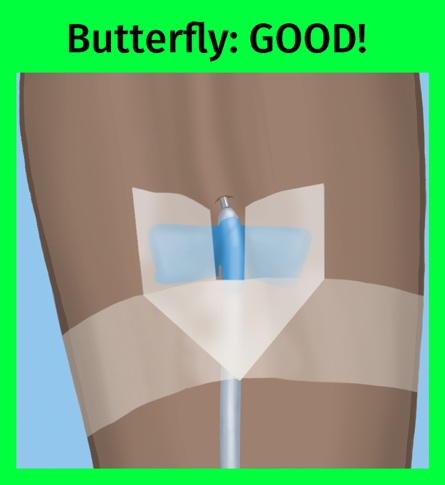
Tape Your Needles
Ant de Villiers has come up with a way to tape the needles with one hand. Here are the steps:
-
Clean the surface where you will cut the tape.
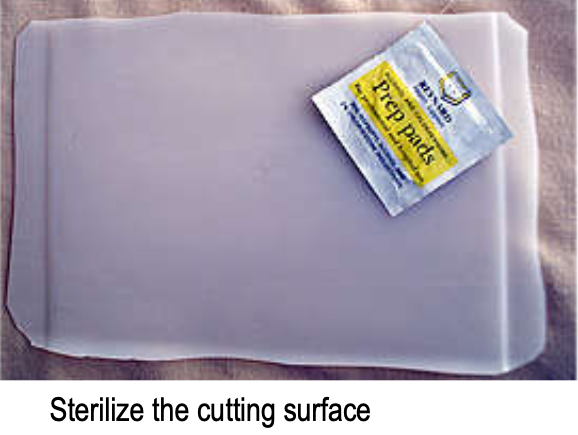
-
Unroll 5-6 inches of tape (14 cm).
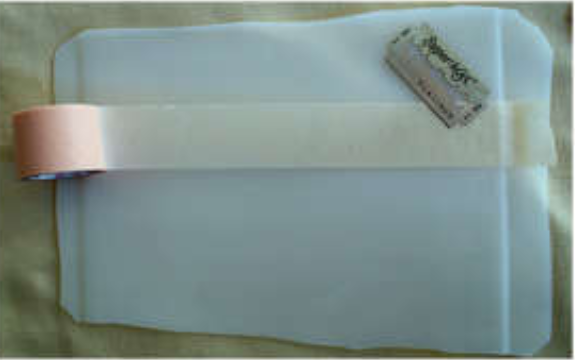
-
Use a sterile blade to cut the tape into strips. (Tape will gum up a scissors.)
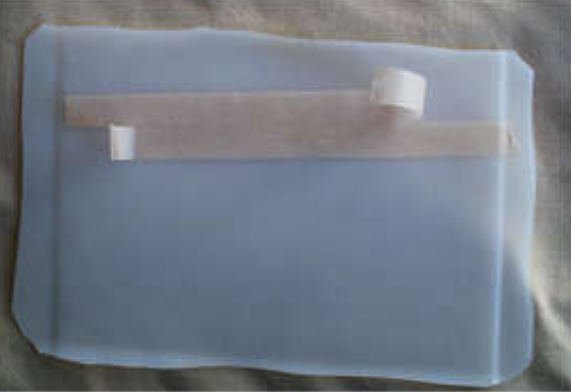
-
Affix the tape, sticky side up, under the needle base. Now, you are ready to cannulate.
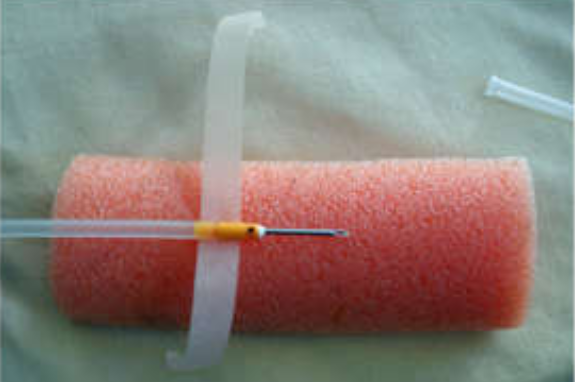
-
Once the needle is in, you can cross the tape over the top of the tubing and stick down the ends to secure the chevron.
-
Adjust your overbed table to the right height to self-cannulate. Rest your arm in front, close to eye level, not bent over a pillow to one side.
-
Close all clamps. Check and recheck clamps. A word of warning: You will only forget to do this ONCE. The mess will serve as a reminder!
-
Recycle when you can. Home HD creates a lot of waste. Save and re-use what you can for other purposes. Use the plastic bag the cartridge comes in as a trash bag for during treatment. Tape it to the side of the tray table and drop in used supplies.
-
Easy clean up.Bleach wipes work great for a quick wipe down. Alcohol wipes work, too, in a pinch, or a spray of hydrogen peroxide on cotton gauze.
Helpful Tips:
-
Adjust your overbed table to the right height to self-cannulate. Rest your arm in front, close to eye level, not bent over a pillow to one side.
-
Close all clamps. Check and recheck clamps. A word of warning: You will only forget to do this ONCE. The mess will serve as a reminder!
-
Recycle when you can. Home HD creates a lot of waste. Save and re-use what you can for other purposes. Use the plastic bag the cartridge comes in as a trash bag for during treatment. Tape it to the side of the tray table and drop in used supplies.
-
Easy clean up.Bleach wipes work great for a quick wipe down. Alcohol wipes work, too, in a pinch, or a spray of hydrogen peroxide on cotton gauze.
How to Manage During a Treatment
Your training will teach you how to connect to the machine.
Follow your training. Check everything twice: vital signs, blood flow rate, and alarms. Keep an eye on the screen, so you can have a more restful treatment.
Helpful Tips:
-
Think ahead. Once you start a treatment, you are out of luck If you forget the TV remote across the room or want a snack.
-
Before you begin, create a checklist of steps to do and things to have within reach. Watch this video or this one, or use this checklist to set up the machine and PureFlow, if your clinic approves. Use the bathroom and wash your hands.

-
Be sure your chair works for you. Your clinic should give you a chair, which may work for you. But, you have might have to push down—hard—on the footrest to sit up if you need to. This is hard to do with needles in your arm. Some solo dialyzors buy a recliner with a quick release button to sit up. Some use a sofa or bed. Whatever you choose, make sure it’s easy to get into and out of.
-
CMS only requires vital sign checks at the start and end of a treatment. If your treatment is stable, ask your care team if it is safe to skip at least some of the 30-minute vital checks.
While alarms can feel like a hassle, they can be lifesavers. At the start, every alarm is scary. You can’t help but worry if there is air in the line, or a clot. Most alarms are due to your fistula position, a kinked line, or other technique failure. No matter how long you have been doing home dialysis alone, there will always be the odd day when you miss a step. No worries. NxStage technicians are very understanding. They will help you through any alarm.
Helpful Tips:
-
Turn on the PureFlow. If you forget, your blood circulates, but will not get clean. The clock will not advance. You will usually get a yellow #14 alarm if this happens.
-
Another common alarm on startup is a #10 or #11. These tend have to do with how the needles are positioned.
-
Call NxStage Technical Support (866) 697-9243, Option 1 for any alarm you cannot clear after one or two tries. Have them on speed dial. The technicians will become your new best friends.
-
At some point, you will most likely get a sak leak in the PureFlow tub. We all have. Here is a handy tip sheet on how to handle a sak leak. You can also use a shop vac.
If your power goes out, you may need to get off the machine using a manual rinse back or clamp and unhook. Your clinic will teach you what to do. Tell the clinic if this happens. They will order an extra test to see if you need more Epogen and/or iron. Make an emergency pack with the supplies you would need to get off the machine quickly. Keep a list of steps with it—you may forget what to do, since problems are so rare.
I trained for solo, although I’m married. My husband works full-time and has to take calls. I am glad I can do treatment at home. I’ve been on HD for 6 years and home HD for a year. One time, my arterial would not quit bleeding. I held pressure for a long time, and was able to dial my center. A nurse did a home visit and helped me. I ended up needing a stent inserted, and all was fine after. Here are my tips if you’re alone:

-
Keep a cell phone charged at all times and nearby.
-
Have NxStage and your center on speed dial, including the on-call nurse number.
-
I do not do nocturnal, so I leave a door unlocked in case someone needs to get inside.
-
I have some people who live nearby and are willing to “drop and come” if I need help but not 911. They are on speed dial, but I have never needed them in a year.
Sometimes nature calls. You need to learn how to disconnect for a bathroom break. This checklist walks you through the steps.
Monthly Lab Tests
Once a month you will draw your labs and mail them. This is a simple procedure you will learn in training. You will need a centrifuge to spin the blood for specific tests. (Your clinic will provide this for you.) The lab tests show how well your dialysis is doing its job. Based on your tests, your doctor may adjust your dialysis treatments.
For these tests, your nurse will provide lab tubes with labels. Most clinics provide you with shipping boxes. Be sure to follow the instructions on how to ship your samples. Otherwise, the lab may be unable to process them. Note: Put the ice pack in the freezer at least 24 hours before you plan to draw your labs.
Review your lab tests with your care team at your clinic visit. Most clinics will let you see your results online. But, some will give you a summary of just the key ones. Your full lab results have a lot of vital data that you may have to ask for each month at your clinic. Ask to be sure you understand what each of your lab tests means.
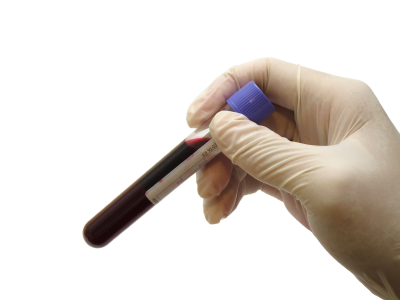
Drawing the LabsWhen you draw your own labs, you won’t need a separate needle stick. You can draw the blood from your dialysis needle into the lab tubes. The tubes are color coded. You will learn which tubes to draw before or after your dialysis treatment.
After you draw each tube, gently turn it upside down and back up 7–10 times. Do not shake a blood tube—that can break some of the blood cells so the test won’t be accurate. The clinic will tell you which tubes need to spin in a centrifuge, and for how long. Click here to see a great video about drawing your labs.
The Department of Transportation makes the rules for transport or hazardous materials. These rules cover blood tubes that you ship to a lab. Your clinic will show you the right way to do this. You will receive a shipping box, packing materials, and an ice pack for each shipment. The shipping box has a prepaid label. You do not have to pay to ship it.
If your treatment is in the evening, keep the tubes in the fridge. You can send them out the next day. Based on where you live and your clinic’s policy, you may have a few options to ship the tubes:
-
Call FedEx or UPS and schedule a pickup. There is no charge to you for this service.
-
Drop the box off if you have a drop off box or store nearby.
-
Drop your tubes off at the clinic on the day you draw them or the morning after.
Helpful Tips:
-
Once you draw your labs, you need to keep some of the tubes cold. If you can fit a small refrigerator near your treatment chair, you can chill the blood tubes that way.
-
Or, put a frozen ice pack in the insulated shipping bag. Store the tubes in the bag until you are done. Then complete your labs and refrigerate the tubes until you are ready to ship.
-
Keep your centrifuge nearby, on a flat surface, so you can spin the pre-treatment lab tubes. Then place those tubes with the others in the insulated bag or refrigerator.
Medications During Treatment
Your doctor may prescribe drugs for you. You may need medicine to prevent blood clots. Your nurse will show you how to do this through your access, before you hook up to the machine. You may need a dose during a treatment, too. If so, this one will go through a port in the dialyzer. Or, for longer treatments, your clinic may give you a pump.
You may also need to treat anemia. Your clinic will teach you about the drug(s) to use and how to give it.
Travel with Solo Home HD
One of the best things about being on home dialysis is the freedom to travel. When you do solo home HD, this may seem scary at first. Start slowly. Try a practice run first. Plan a long weekend nearby, with friends, or at a hotel. Use our Travel Checklist or make one of your own. Each time you travel it will get easier. Do not be afraid to ask for help from travel employees, and even strangers. The key thing is to PLAN, PLAN, and then PLAN some more. This article has tons of great tips and takes you through trip planning step-by-step.
Helpful Tips:
-
Pack a kit of what you need for each treatment in its own Ziploc® bag. Make up one bag for each treatment that you plan to do during your trip. Pack at least one extra saline bag and cartridge—and more for longer stays.
-
Bring duct tape! When all else fails, duct tape can solve a lot of problems. A small portable tool kit can come in handy for attaching removable parts, too.
-
Always pack enough for extra treatments. Sometimes you’ll forget something or run out. Plans can change.
-
Use your resources. Contact your nurse to see if she can arrange for you to borrow any missing supplies from a nearby clinic. Go to an online support group and see if there are other patients nearby. They can often help out.
-
Bring $100 in small bills for tips. The people who help you deserve a reward: Skycaps, bellmen, taxi drivers, airport wheelchair attendants. Without their kindness, travel would be impossible.

NxStage will ship your dialysis supplies to your destination(s). They do this at no charge within the continental U.S. You must order through your clinic nurse. At least 60 days before you plan to go, give your nurse the dates, supply list, and where to ship them.
Note:It is YOUR job to be sure your supplies arrive. NxStage Travel should call to confirm your order. If you do not hear from NxStage, call them. A few days before you leave, call your destination to be sure your supplies arrived. Have someone send you a picture of each box.
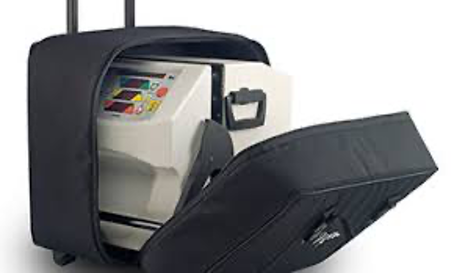
For short trips by car, your clinic may lend you a travel case on wheels for the cycler. For trips by air or sea, you must use the hard case. The NxStage machine will not be insured for damage if you don’t. If your clinic does not have one, ask them to check if nearby clinics have a loaner. If you plan to fly a lot, you may want to buy a hard case from NxStage and a TSA PreCheck and/or Clear pass.
Helpful Tips:
-
By car: use the soft travel case or secure the NxStage on a seat with the seatbelt.
-
By airplane: use the hard travel case. Contact your airline’s Disability Desk for help. Use the airline’s wheelchair service. Even if you don’t need one, the attendants can help with baggage and the machine. They can also get extra help if you need it. Using a wheelchair will let you get through Security without waiting in long lines.
-
By bus or train: there is no guidance for traveling with the cycler by bus or train. Call the Disabilities Department of the carrier you plan to use. Some trains have no room for the cycler and no baggage handler to help you load. Loading a NxStage on a bus is at the discretion of the company.
-
RV or camper: many dialyzors have adapted an RV or camper to carry a NxStage cycler.
-
Cruise: Most cruise lines will accept a NxStage cycler and let you dialyze in your room. Check with their Disability Coordinator before you book a cruise, though.
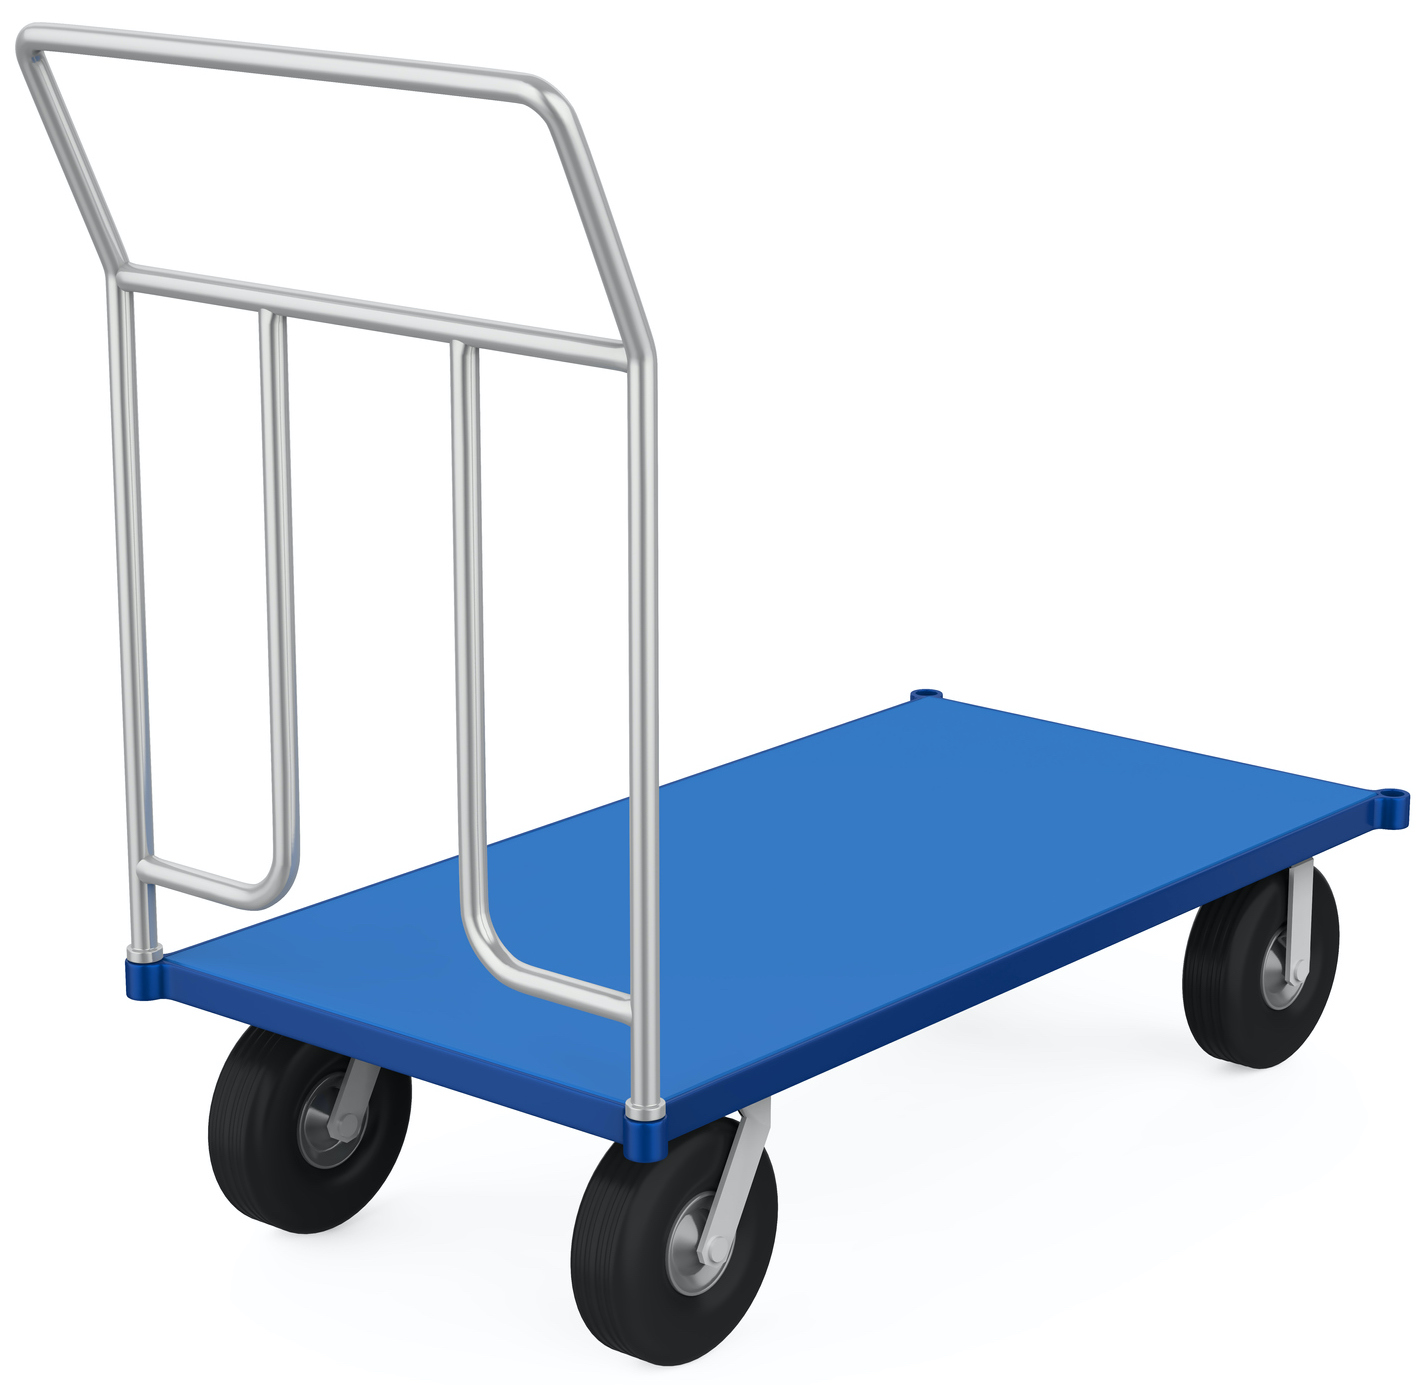
Your first task for a trip will be to get the NxStage cycler into its travel case and out of the house. Try a folding cart, like this one that you can buy on Amazon. You can use it to move supplies as well as for travel. If you need help to lift the machine into the travel case, onto the cart, or into the trunk of the car, ask friends, families, neighbors, or a local church. If all else fails, pay a local handyman. Build a network of resources that you can rely on for help.
Hotels may try to charge to receive each box of your supply order. Talk with the manager before you book your room. Ask that no fees be charged. Life-sustaining medical supplies should not be subject to any fees. Get the manager’s name, in case you need it. Make notes about the call.
When you arrive, use bellman to move your machine and luggage. Be sure to tip! When you do a treatment solo in a hotel room, do not lock the security latch. Staff need to get in if you call them with a problem. Put all trash in a heavy-duty black trash bag. Stack or break down your empty boxes. Mark everything as trash, and tip housekeeping to remove it. Have fun!
Travel Resources for Dialyzors
Patient Travel Stories
-
Two for the Road: Seeing the World, Living With a Chronic Illness
-
So, You Think Driving a 7-Passenger Van on the Wrong Side of the Road in a Foreign Country is Crazy?
-
Visiting a 15th-Century Castle: The Castle Fraser Challenge!
-
A Whisky Primer: Every Day Should Begin With a Distillery Tour
Conclusion
With home dialysis, you can dialyze to live, not live to dialyze. It will take time to find a schedule that works for you. The beauty of home HD is that there is no required schedule. As long as you fit in the prescribed number of treatments, you can dialyze when you want.
Choosing to do home HD solo can change your life—for the better. The FDA would not have approved this option if they did not believe it was safe. You will feel more in control of your day-to-day life and can feel better getting longer and/or more frequent treatments. You are never really alone. Help is on the other end of the phone or online. You won’t regret getting your life back.